MFT Journaling Forensics - Tools & Techniques
- Idan Buller

- Jul 13, 2022
- 3 min read
Updated: Jul 16, 2022
File system Journaling is a safety and integrity mechanism used by Windows OS to record all changes made to a volume.
In case of a crash or power failure, the system can use the information stored in these journals to roll back.

The forensic value of MFT journals is that they can be used to find evidence of file creations, deletions, renames, etc. The journals might be the only way to prove a file once existed on a machine, even if the file was deleted, renamed, or used any anti-forensics mechanism.
We are going to cover 2 journals, and then, of course, I will show you how to extract the forensic information we need:
$UsnJrnl
This file is stored in $Extend\$UsnJrnl.
This file has alternate data streams ($J & $max). $J is the one who stored the information. $J is also stored as a sparse file that might be large in size and contain a lot of high-level Operation Codes such as FileCreate, RenameNewName, DataOverwrite, FileDelete, etc. Although, this information may only last a few days to weeks on busy systems.
$LogFile
This file is stored in the volume root.
This file has alternate data streams ($J & $max). $J is the one who stored the information. The file contains a lot of low-level Operation Codes such as InitializeFileRecordSegment, AddIndexEntryAllocation, DeleteIndexEntryAllocation, etc. Although, this information may only last a few hours to days on busy drives.
Bonus Tip:
Due to the short lifetime of the files, try to extract the Volume Shadow Copies of the drive and extract MFT information from the restored drives!
How to extract the forensic information?
We are going to use:
- KAPE (https://www.kroll.com/en/services/cyber-risk/incident-response-litigation-support/kroll-artifact-parser-extractor-kape) to acquire the NTFS $MFT and journals.
- MFTECmd (https://ericzimmerman.github.io/#!index.md) to parse the $MFT and the $UsnJrnl.
- TimelineExplorer (https://ericzimmerman.github.io/#!index.md) for analysis.
Phase 1 - Extracting $MFT and journals (KAPE)
The \Targets\Windows directory is the one that would help us to grab the forensic artifacts that we are after.
Inside this directory, we will find $J.tkape and $MFT.tkape. Those are the files that KAPE will use to extract the information.

Also, inside \Targets\Compund we will find FileSystem.tkape that will execute the files that we need. this file will be our KAPE target.

The only command we need to execute is -
kape.exe --tsource C: --target FileSystem --tdest C:\Users\USERNAME\Desktop\ --vhdx testThis command creates a .zip file with a .vhdx file that allows Windows OS to mount the test drive automatically.

Phase 2 - Parsing $MFT and journals (MFTECmd)
Inside the output of the KAPE execution, we will find $MFT and $Extend\$J files
that we are specifically interested in.

The only 2 commands we need to execute are -
MFTECmd.exe -f F:\C\$MFT --csv C:\Users\USERNAME\Desktop\ --csvf mft.csvMFTECmd.exe -f F:\C\$Extend\$J --csv C:\Users\USERNAME\Desktop\ --csvf usnjrnl.csvNow, 2 .csv files with our needed information are on our desktop.

Phase 3 - Analyzing $MFT and journals (TimelineExplorer)
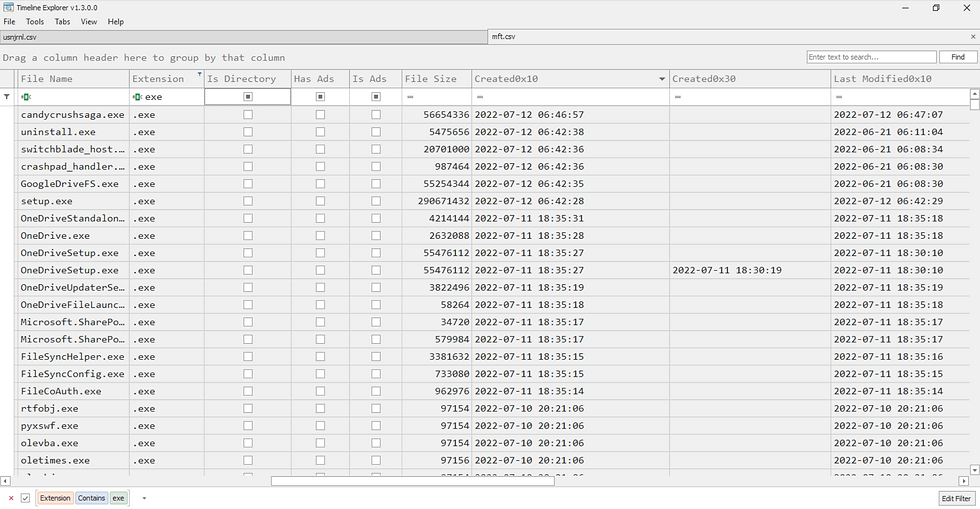
Open both mft.csv and usnjrnl.csv in TimelineExplorer.
We are currently taking a look into mft.csv - notice that we have our MACB timestamps (Stands for The MAC(b) times are derived from file system metadata and they stand for:
Modified
Accessed
Changed ($MFT Modified)
Birth (file creation time)
)

Also notice that for every column in the MACB, we have 2 columns each -
0x10 - Standard information timestamp, accessible by windows API, shown in the file explorer,
0x30 - File_Name information, Accessible by the Windows OS kernel.
If there is any difference between the 2 columns, we can detect it with the help of the "SI<FN" column.

We are currently taking a look into usnjrnl.csv - notice the "Update Reasons" column, where we can search through the Opcodes such as FileCreate, FileDelete|Close, etc.

Now, in order to trace the changes made on a file, we can search its name or extension in the "Name" or "Extension" columns and watch the changes that have been done.


In addition, a much more efficient way to trace the steps of a file will be to search for its "Entry Number", and now we can triage the evidence as it is presented. Notices the file was downloaded as .TXT file and was changed to a .PS1 file.


Comments